Say Goodbye to Messy Digging: The Ultimate Guide to Pipe Relining for Sewer Leaks

Introduction

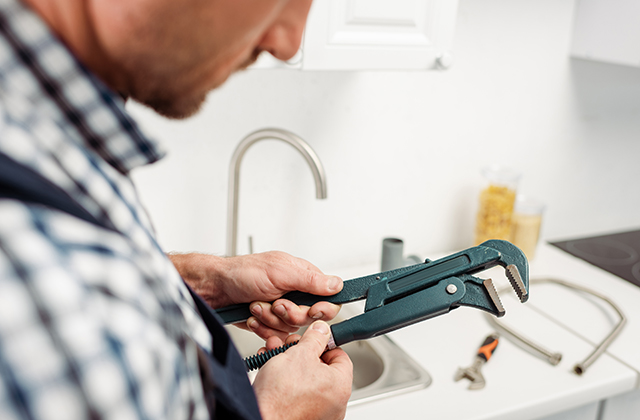
Sewer leaks are a frustrating and often messy problem for homeowners. Traditional pipe repair methods involve digging up your yard, driveway, or even the street in order to access the damaged pipes. Not only is this process time-consuming and expensive, but it can also cause damage to your property. Sydney relining pipe always on the go if there is an emergency sewer repairs.

Pipe relining, on the other hand, is a minimally invasive method for repairing damaged pipes that doesn’t require any digging. In this guide, we’ll explore everything you need to know about pipe relining and how it can help you say goodbye to messy digging once and for all.

What is Pipe Relining?

Pipe relining is a process for repairing damaged or leaky pipes without the need for excavation. Instead of digging up the old pipes and replacing them, a new lining is inserted into the existing pipes. This lining then hardens and becomes a new, durable pipe within the old pipe.

How Does Pipe Relining Work?

The pipe relining process involves several steps. First, the damaged pipe is cleaned and inspected using a high-resolution camera to identify the location and extent of the damage. Next, a liner is inserted into the pipe and inflated to conform to the shape of the pipe. The liner is then cured in place using hot water or steam, which causes it to harden and become a new, seamless pipe within the old pipe.

Benefits of Pipe Relining

There are several benefits to choosing pipe relining over traditional pipe repair methods. First and foremost, pipe relining is minimally invasive, meaning there is no need for excavation or digging. This can save you time and money, as well as minimize damage to your property. Additionally, pipe relining is a more environmentally friendly option, as it reduces the amount of waste generated during the repair process. Finally, pipe relining can be done in a fraction of the time it takes to complete traditional pipe repair, meaning you can get back to your normal routine faster.

Signs You May Need Pipe Relining

Not sure if pipe relining is the right option for your sewer leak? Here are some signs that may indicate you need pipe relining:

  • Frequent clogs or backups in your plumbing
  • Foul odors coming from your drains or pipes
  • Slow draining or standing water in your sinks or tubs
  • Wet spots or puddles in your yard
  • Low water pressure

If you’re experiencing any of these issues, it’s important to contact a professional plumber to assess the situation and recommend the best course of action.

How to Choose a Pipe Relining Company

When choosing a pipe relining company, there are several factors to consider. First, make sure the company you choose has experience with pipe relining and a track record of success. Additionally, look for a company that uses high-quality materials and equipment, and that offers a warranty on their work. It’s also a good idea to read reviews and ask for referrals from friends or family members who have had pipe relining done in the past.

Cost of Pipe Relining

The cost of pipe relining varies depending on several factors, including the extent of the damage, the size of the pipes, and the location of the damage. However, in general, pipe relining tends to be less expensive than traditional pipe repair methods due to the lack of excavation and labor costs. Additionally, some insurance policies may cover the cost of pipe relining, so be sure to check with your insurance provider.

DIY Pipe Relining vs Professional Pipe Relining

While there are DIY pipe relining kits available on the market, it’s generally not recommended to attempt pipe relining yourself. Pipe relining requires specialized equipment and knowledge to ensure the lining is properly installed and cured. Additionally, if the lining is not installed correctly, it can actually worsen the problem and cause more damage.

Professional pipe relining companies have the experience and equipment necessary to ensure the job is done right the first time. While the cost may be higher than a DIY kit, the peace of mind and long-term benefits of a professional job are well worth it.

How Long Does Pipe Relining Last?

Pipe relining is a durable and long-lasting solution for sewer leaks. In fact, many pipe relining companies offer warranties of 50 years or more on their work. Properly installed and maintained, pipe relining can last for decades, making it a cost-effective and efficient solution for homeowners.

Pipe Relining FAQs

  1. Is pipe relining environmentally friendly?

Yes, pipe relining is a more environmentally friendly option than traditional pipe repair methods, as it reduces the amount of waste generated during the repair process.

  1. How long does pipe relining take?

The length of time required for pipe relining depends on the extent of the damage and the size of the pipes. However, in general, pipe relining can be completed in a fraction of the time it takes to complete traditional pipe repair methods.

  1. Will pipe relining fix all types of sewer leaks?

Pipe relining is an effective solution for most types of sewer leaks, including cracks, holes, and corrosion. However, in some cases, traditional pipe repair or replacement may be necessary.

  1. Is pipe relining more expensive than traditional pipe repair?

In general, pipe relining tends to be less expensive than traditional pipe repair methods due to the lack of excavation and labor costs. Additionally, some insurance policies may cover the cost of pipe relining.

  1. Can I use DIY pipe relining kits?

While DIY pipe relining kits are available on the market, it’s generally not recommended to attempt pipe relining yourself. Pipe relining requires specialized equipment and knowledge to ensure the lining is properly installed and cured.

Conclusion

Sewer leaks can be a major headache for homeowners, but with pipe relining, there’s no need to deal with messy digging or expensive repairs. By choosing pipe relining, you can enjoy a minimally invasive, environmentally friendly, and cost-effective solution to your sewer leak problem. Contact a professional pipe relining company today to learn more and schedule a consultation.

Custom Glass Costs vs. Value: How to Make the Right Investment for Your Home

Custom glass is a type of glass that is specifically designed to fit the unique needs and preferences of a homeowner. It can be used for a variety of purposes, such as windows, doors, shower enclosures, and decorative accents. Custom glass has become increasingly popular in recent years, as homeowners seek to add a touch of elegance and personalization to their homes. However, investing in custom glass can be a significant expense, and it is important to understand the costs and value of this investment before making a decision. Tempered glass cut to size is not too expensive if you have the right size before they cut it.

Types of Custom Glass

There are several types of custom glass to choose from, depending on the intended purpose and desired aesthetic. Clear glass is the most common type of custom glass and is often used for windows and doors. Tinted glass is ideal for areas that require additional privacy or UV protection. Frosted glass provides a sleek and modern look and is often used for shower enclosures or office partitions. Stained glass is a beautiful option for decorative accents, such as doors or windows. Tempered glass is a safety glass that is designed to shatter into small, harmless pieces if broken. Laminated glass is a type of safety glass that is made by sandwiching a layer of plastic between two sheets of glass.

Factors Affecting Custom Glass Costs

The cost of custom glass can vary widely, depending on several factors. One of the most significant factors is the size of the glass. Larger pieces of glass will generally be more expensive than smaller pieces. The type of glass also affects the cost, with more specialized types of glass being more expensive. The complexity of the design can also impact the cost, as intricate designs will require more time and labor to create. Finally, installation costs should also be considered, as the cost of installation can be a significant expense.

Benefits of Investing in Custom Glass

Despite the initial expense, investing in custom glass can offer several benefits to homeowners. One of the most significant benefits is improved aesthetics. Custom glass can add a touch of elegance and sophistication to any home, and it can be customized to fit the unique style and preferences of the homeowner. In addition, investing in custom glass can increase the value of the home. According to a report by Remodeling Magazine, investing in new windows can have a return on investment (ROI) of up to 73.4%. Custom glass can also improve energy efficiency, as certain types of glass can reduce heat transfer and lower energy bills. Additionally, custom glass can improve the security of a home, as tempered and laminated glass is more difficult to break than traditional glass.

Cost vs. Value of Custom Glass

When considering the cost vs. value of custom glass, it is important to look beyond the initial expense. While custom glass can be more expensive than traditional glass, it can offer significant cost savings in the long run. For example, investing in energy-efficient glass can reduce energy bills and provide cost savings over time. Custom glass is also durable and requires minimal maintenance, which can save homeowners money on repairs and replacements in the long run. Finally, investing in custom glass can increase the value of a home, making it a worthwhile investment for homeowners who plan to sell their home in the future.

How to Choose the Right Custom Glass Investment for Your Home

Choosing the right custom glass investment for your home depends on several factors. The first consideration should be your budget. Custom glass can be expensive, so it is important to determine how much you are willing to spend. The purpose of the glass should also be considered, as different types of glass are better suited for different applications. Finally, style and design are important considerations, as custom glass should complement the existing décor of the home.

Conclusion

Investing in custom glass can be a worthwhile investment for homeowners who are looking to add a touch of elegance and personalization to their homes. While custom glass can be more expensive than traditional glass, it can offer significant benefits in terms of aesthetics, energy efficiency, and home value. When choosing a custom glass investment, it is important to consider factors such as budget, purpose, and style. Learn more about the custom glass to use for your bathroom.

Glass Replacement & Repair For Your Kitchen Cabinets

Introduction

There are many reasons why you may want to replace or repair your kitchen cabinets, but whatever the case is, you will be able to get professional assistance for it. You can either choose to do this yourself or hire a professional who does this all the time. The job for window replacement near me has many contractor on standby.

The following are the steps that need to be followed when replacing or repairing broken cabinet doors:

Glass Replacement & Repair For Your Kitchen Cabinets

Here at R.E.M., we are the glass replacement and repair experts for your kitchen cabinets. We have built our reputation on providing the highest quality service in Edmonton, Alberta.

If you have a need for rock chip repairs or cabinet door glass replacement & repair, look no further than R.E.M.. We can help you with any of these issues that may be affecting your kitchen cabinets!

How to Replace Kitchen Cabinet Glass

Replacing Kitchen Cabinet Glass:

  • Remove the glass. In most cases, you will be able to remove the old panel by simply lifting it off of its hinges and then removing any hardware that holds it in place. If you have trouble removing your panel, use a flathead screwdriver or similar tool to carefully pry it out of its frame.
  • Clean the channel. Before inserting your new glass panel into place, clean out any debris from inside of your cabinet frame—this will ensure that your new glass fits snugly against the frame once installed and makes it easier to install hardware later on. You can use a vacuum cleaner attachment or compressed air to remove dirt particles from inside of the frame; if there are stubborn pieces of debris leftover after using an attachment or compressor, try using dish soap (and water) with a sponge or paper towel instead!
  • Snap in a new glass panel. After everything is cleaned out, gently insert your replacement piece as far back into place as possible before tightening any screws so that you don’t destroy them during installation; if necessary, trim off excess material from around edges with tin snips before proceeding further down this process list below! Replacing Hardware :​ After installing all necessary hardware onto each door hinge side-by-side then securing them together tightly enough so they’ll stay firmly shut when closed again later on down this list too! Installing Doors :​ Finally reattached both doors securely onto their hinges first before screwing them back into position securely enough so they won’t come loose again anytime soon now either…

Step: Remove the glass.

  • Remove the old glass
  • Clean the channel
  • Place the new glass in the channel
  • Snap the glass into place

Step: Clean the channel and glass.

After you remove the old glass, clean the channel and the new glass with a soft cloth. Then apply a thin layer of bar soap to both sides of the channel (no need to put any on the glass). This will help ensure they stick together as they should.

  • Cleaning up moisture: If there is any moisture left over after cleaning your cabinet, use a dry cloth to wipe it off before re-installing your new glass.

Step: Snap in a new glass panel.

Now that you have the proper tools, it’s time to begin snapping in your new glass panel. First, remove the old glass from its channel using a putty knife or other flat-edged tool.

Next, clean out any debris from inside of the channel (you may want to wear a mask for this step). Then, line up your new piece of tempered glass with the opening and check whether or not it fits properly in place by gently tapping on it with your knuckle. If there is any resistance while tapping on it, try removing and reinstalling again until it feels snug enough where no additional pressure is needed to keep everything secure and snugly fit into place while being tapped at all four corners of each frame corner where they meet up together perfectly flush against each other without having gaps between them showing off what lies behind them because if someone were able to get their hand inside there then they might be able use one hand while holding onto something else like maybe even another human but then again maybe not since people don’t always follow rules so either way just make sure everything fits securely before continuing moving forward into next step which would be checking for leaks using soap bubbles because we all know how much fun those can be!

If after checking everything has been correctly installed correctly then congratulations! You’re done installing new cupboards doors/drawers etcetera!”

Step: Replacing the Glass Panels in Kitchen Cabinets

Step: Replacing the Glass Panels in Kitchen Cabinets

  • Remove the glass panel from your cabinet doors.
  • Clean the channel where you removed it from, removing all debris and pieces of old adhesive tape. If you notice any cracks or chips, these should be repaired before installing new glass panels to avoid further damage.
  • Snap new glass panels into place using a new bead of silicone caulk, then install door hardware as needed (if any).

How to Repair Cracked or Broken Glass in Kitchen Cabinets

If you have a broken glass panel in your kitchen cabinets, there are two options for repairing it.

  • Remove the glass panel: The first thing to do is remove the glass from the channel. Using a putty knife, gently pry out both pieces of glass and clean out any debris or grime that may have accumulated within it.
  • Clean off any rust or corrosion: If there is rust and corrosion on your metal frame, use steel wool to remove it before applying new caulking.
  • Snap in a new piece of tempered safety glass: Once everything has been cleaned up, snap in a new piece of tempered safety glass with rubber gaskets between each side and along the bottom edge (where they meet).

Step: Remove the doors and hardware.

  • Remove the doors.
  • Remove the hardware.

Step: Replace glass.

Step: Replace glass.

  • Use a glass scraper to remove the old adhesive from the channel and new glass, then clean it with a damp cloth.
  • Use a putty knife to remove any remaining adhesive from your cabinet door frame or face frame if necessary, paying special attention to corners where old glue may be hiding (or if you’re installing new shelves). If there are gaps between your cabinet doors or drawers when they close, this is also where you can find extra adhesive that needs removal before installing new hinges on each door/drawer so they close seamlessly with minimal effort in either direction (open or closed).
  • Cut out new sheet of tempered glass with an electric glass cutter — make sure it’s tempered! You don’t want another accident like this one happening again…

DIY Vs Professional Glass Replacement for Kitchen Cabinets

  • DIY glass replacement for kitchen cabinets is less expensive, but your time will be consumed doing the work yourself.
  • Professional glass replacement for kitchen cabinets will be more expensive, but it will be done faster than if you were to do it yourself because you don’t have to take the time to learn how to install new glass or repair damaged glass properly. The professional has already perfected this ability and can complete their job quickly and efficiently, saving you money in the long run by not requiring multiple visits from them over several months or years of use due to improper repairs or installation work done by yourself repeatedly failing due to lack of experience or knowledge when installing/repairing your own home’s windows and doors (or other areas around your house).

Where to Get Rock Chip Repairs Done in Edmonton?

If you are looking for a place where rock chip repairs can be done, then the first thing that you need to do is find the right repair shop.

There are many different options when it comes to finding a rock chip repair shop in Edmonton. While there may be more than one option available, choosing the right one will help ensure that your cabinets look great again.

Here are some of your options:

  • Yellow Pages – This could be an excellent place to start as long as you know what kind of results you want and which companies have those results. You should also consider looking online at sites such as Yelp or Google+ Local or even Facebook if there is any social media presence from these repair shops already established online (which there usually is).
  • Word of Mouth – If someone has had their own kitchen cabinets repaired recently then they might know where they went for these services. They may even be willing to recommend someone who did good work for them so make sure not just ask them whether or not their cabinets look good now but also how satisfied they were with their experience overall before recommending anything else!

Where can I get Cabinet Door Glass Replacement & Repair?

You can get Cabinet Door Glass Replacement & Repair in Edmonton, AB by contacting the Glass Doctor. They are a professional glass repair company that is available 24/7 to help you with your glass replacement or repair needs.

Final Thoughts on Cabinet Door Window Replacement & Repair in Edmonton, AB!

By now, you should have a good understanding of why it’s important to have your cabinet door windows replaced or repaired. Whether you’re a handyman who wants to give his kitchen an upgrade or a homeowner who has had some time on their hands, we hope this guide was helpful! If you do decide to take on the task yourself, remember that there are plenty of online resources where you can find step-by-step instructions on how to replace or repair your cabinet doors. If replacing or repairing isn’t something that interests you and would rather just get rock chip repairs done in Edmonton right away, we’ve got that handled too! Just give us a call at 780-444-7200 today!

Your kitchen cabinets will look brand new after window replacement or repair!

The best way to increase the value of your kitchen cabinets is by having them repaired or replaced. This will help you:

  • Look at your kitchen cabinets with a fresh pair of eyes and see how much better they look now that they’re not broken.
  • Feel safer knowing that falling glass has been removed from your home.
  • Save energy consumption since there’s less chance of heat loss due to broken glass–who said something about saving the planet?
  • Feel more secure in knowing that burglars can’t break into your home through the windows anymore (they can still just walk right through).
  • Have more durable cabinets, which means they’ll last longer and be easier to use!

Conclusion

As you can see, kitchen cabinet windows are a great way to add depth and style to your kitchen. This is why so many people choose to have them installed in their homes. However, if you want your cabinets to look their best for years to come then it’s important that they are properly maintained and repaired as needed. Whether this means replacing a broken pane of glass or repairing rock chips on the exterior surface using our tried-and-true process, we can handle any job like pros! Learn more in replacing your kitchen glass.